
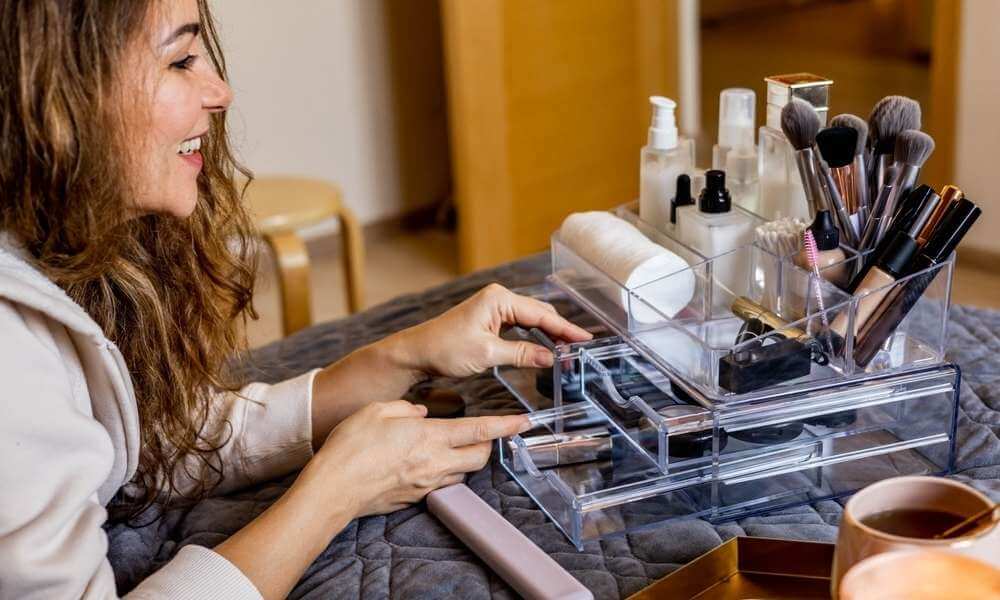
When you’re going to be carrying a lot of makeup, it’s important to have a makeup organizer that you love. That way, you can easily find what you’re looking for no matter where you are or what kind of bag you’re carrying with you. It’s also nice to know that you have a backup if the first one ever gets damaged. If you’re looking to upgrade your current makeup organizer, you might want to check out these tips on how to clean acrylic makeup organizer.
It might not sound like a lot, but acrylic makeup organizers can actually be very easy to clean. If you’ve ever put on a heavy load of makeup and realized that your organizer was getting a little damp, you know how challenging it can be to keep your makeup in place. Makeup can get everywhere, and it can clog up your organizer.
In this roundup, we’ll show you how to clean acrylic makeup organizers so that you can have your makeup kit back in no time. Keep reading to find out what to do.
Things To Avoid
While we’ve gone through what you can do to clean your acrylic makeup organizer, it’s important to note that there are some things that you shouldn’t do. We’ll go over some of the things you shouldn’t do today to help you out.
Don’t Scratch The Organizer
Scratching the inside of your organizer will cause dings and dents that will later collect and turn into marks on your products. This is especially true of the containers themselves since they’re usually metal.
Don’t Put Your Organizer In The Dryer
The high heat from a dryer will cause your makeup to dry out and crack. This is especially true for dry powders and eyelids.
Don’t Put It In The Fridge
Freezing will cause your makeup to solidify, which is not the best way to store it.
Related Post: How to Clean Refrigerator with Vinegar
Apply The Cleaner To Get Rid Of Any Dust Or Debris
When it comes to clean your acrylic makeup organizer, you definitely don’t want to use a harsh substance like a water-based cleanser. The best thing to use is a makeup organizer cleaner. These will get rid of any dust or debris so that your products are able to reach their optimal storage condition.
If you’re not sure where to get started. Here are some of our favorite makeup organizer cleaners.
Get Rid Of The Scratches
Scratches and dings can be the result of numerous things, including but not limited to, being bumped against something hard, your own hand, and the container. Scratches and dings will attract more dirt and dust, and they will also cause indentations in your products that will take longer to dry.
To get scratches and dings out of your makeup organizer, you’ll need to use a sharp object, like a knife, to scratch the surface carefully. Once you’ve gotten rid of the surface scratches. It’s time to clean the inside of the container.
If you’re not sure where to start, check out this guide on how to spot and clean a makeup organizer.
Dust And Light Fingerprints

If you don’t use a lot of makeup, or if you’re looking to try something new and cleaner, you might want to give this a try. It’s super simple.
Just tape a sheet of paper under your lid to protect it from getting flakes on your face. Then, sprinkle a light layer of flour on the surface of your lid.
When you remove the lid, you’ll notice that the flour has thoroughly covered the surface, leaving behind just the paper.
Now, go back and gently scratch your makeup organizer surface with a paper towel to get all of the flour off.
Remove Makeup Stains

This one is pretty important since it will affect the longevity of your makeup organizer.
If you’ve found that your makeup is getting on the clothes, the furniture, and even the walls, it’s time to tackle this.
The first thing to do is to check the load weight. It’s typically printed on the back of your product. But you can also check the weight of your makeup organizer. If it’s too heavy to hold without budging, it’s time to look for a new home.
If the top of your makeup organizer is heavily stained. The bottom might be stronger than the top. In that case, your makeup organizer is likely made of plastic and should be replaced.
Use A Wet Paper Towel With Dish Soap

This is probably the most important thing you can do to clean your makeup organizer.
If you’ve been at it a while and realize that you never clean your makeup organizer, this is the perfect tip for you. Place a large towel under your sink and fill it about two-thirds of the way with water. Then, gently blot your makeup organizer with the other third of the towel.
Related Post: How To Keep Towels Soft and Fluffy
Use Makeup Remover Wipes To Gently
These are the best things ever, right? Yes, they are, and here’s why.
These are the perfect thing to clean your makeup organizer with. They’re gentle on your skin, and won’t damage your skin. And are supposed to be used for regular cleaning (not for intense cleansing). Why not give them a try?
Spray Novus 1 Polish Cleaner And Shine With A Microfiber Towel
Yes, this is another one of those things you should do. You may have a problem if that doesn’t get the rest of the surface clean.
If you’ve been at it a while and realize that you never clean your makeup organizer, this is the perfect tip for you. Place a large towel under your sink and fill it about two-thirds of the way with water. Then, gently blot your makeup organizer with the other third of the towel.
Final Thought
Now that you’ve got your organizing supplies clean, it’s time to put them to use. You can either store your makeup in the exact location or transfer it to a new makeup organizer.
If you’ve got a new makeup organizer, make sure to follow the instructions that came with it. If not, you may end up damaging your products.
Shake things up a bit by using a new product to clean your makeup organizer. You might love using a new cleanser, or you might find that using a different product gives you different results.
There are so many options when it comes to makeup organizer cleansers, that it can be hard to know which one to use. The best thing to do is try them all out and find the one that best works for you.